Nowadays anyone can’t deny that email is the best option to share information and establish communication from one to another. Gmail is a popular free web-based email service offered by Google. Here users can easily create an account and save 15 GBs data at free of cost. As well as users can handle their own Gmail account in any Email Client like- Outlook, Thunderbird, Lotus Notes, Office 365, etc.
Here I am describing all the process to configure the Gmail account in Outlook 2019/2016/2013 etc.
Why do we need to add the Gmail account in Outlook?
*Outlook is a desktop-based email client but Gmail is a cloud-based email service.
*In offline mode, users can access and compose email in Outlook.
*Outlook provided high data security to our data with exchange server connection
*Prevent the data from unauthorized access.
Configuration Process Gmail Account in Outlook:-
User can add Gmail account in Outlook by using IMAP or POP service. Now let’s know about the configuration process of Gmail Account in Microsoft Outlook 2013 by using POP protocol.
1: Enable POP in Gmail account:-
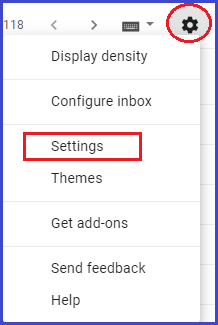
A:- First of all open Gmail account and go to “Setting” option.
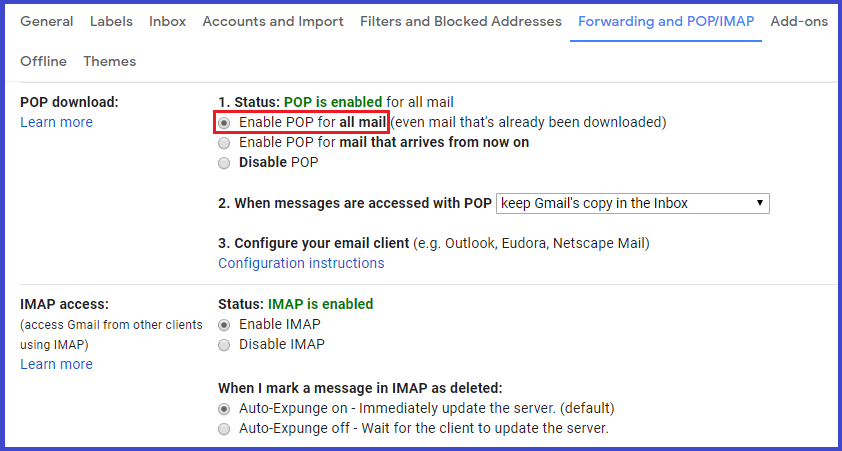
B:- Click on “Forwarding and IMAP/POP” and choose “Enable POP for all mail” radio button.
C:- Finally hit on “Save Changes”.
2: Allow less secure apps:-
A: Go to My Account option and choose Security option.
B: Here hit – Turn on access (not recommended).
C: Now enable less security apps access.
Or directly go to the below-given link to enable less security app:-
https://myaccount.google.com/lesssecureapps

3: Configure Gmail account in Outlook 2013:-
A: Now open MS Outlook and click on “File” tab and hit on “+ New Account”.
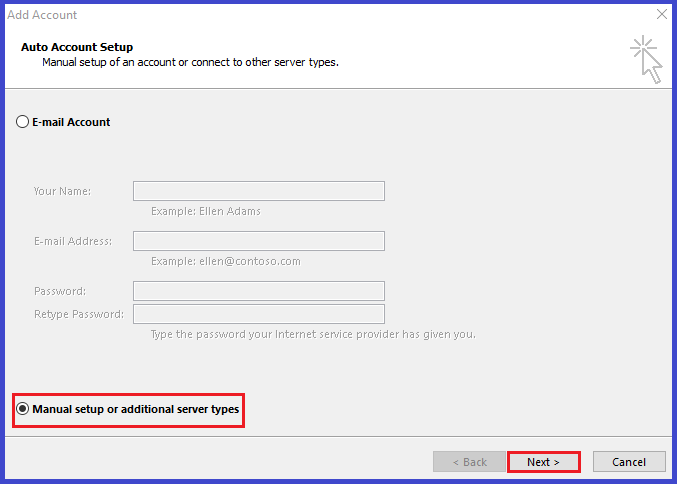
B: In Add Account dialog box, choose “Manual setup or additional server types” and hit on Next button.
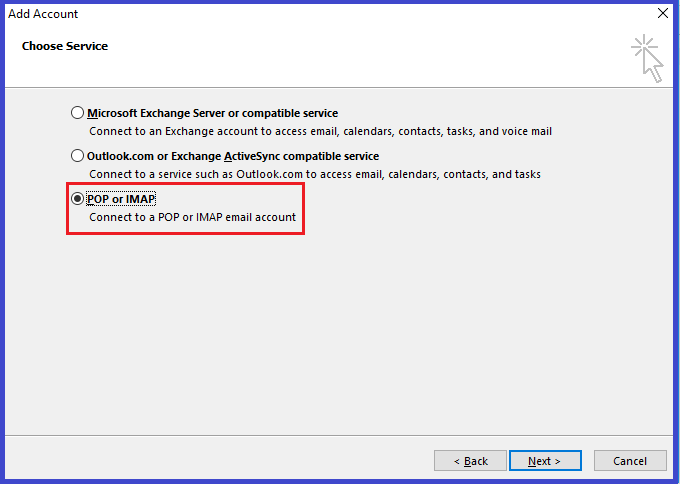
C: Now choose the service “IMAP or POP” radio button and click on Next.
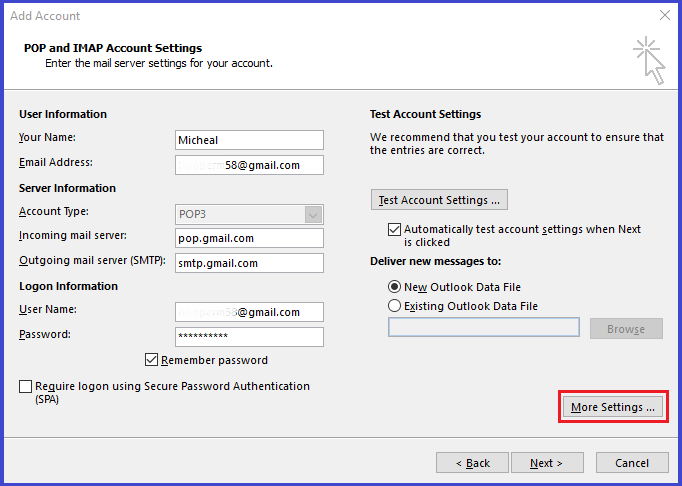
D: In POP and IMAP Account Settings fill all details:-
- In User Information section fill your name & your Gmail ID.
- In Server Information section select Account Type POP3 and fill incoming mail server “pop.gmail.com” and Outgoing mail server “smtp.gmail.com”.
- In Logon Information section put your mail address in user name and fill your password in password section
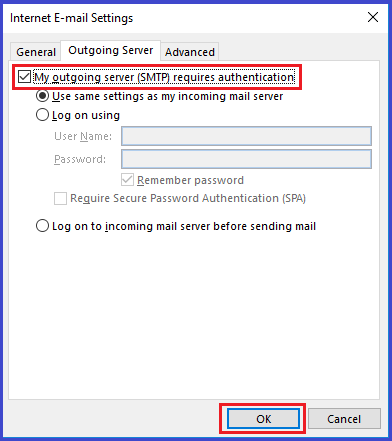
E: Click on More Settings Tab >> Go to Outgoing Server and select “My Outgoing server (SMTP) requires authentication” check-box.
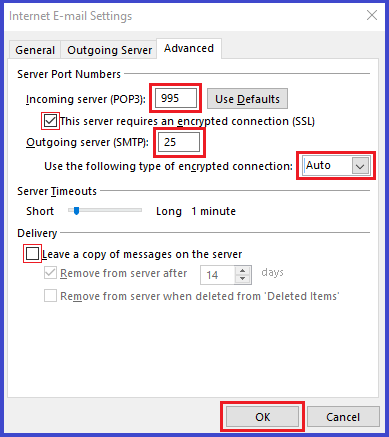
F: In More setting Tab Go to Advance Option provide details like below:-
- Fill Incoming Server (POP3) Port No. 993 and choose this server requires an encrypted connection (SSL)
- Provide Outgoing Server (SMTP) Port No. 25. Apart from this select Auto in “Use the following type of encrypted connection”
- Uncheck Leave a copy of messages on the server option.
G: Now click on Next button and wait a moment for it to configure.
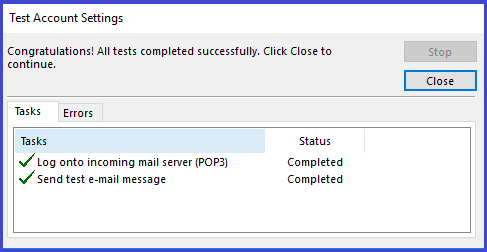
H: After completed the test account setting click on Close tab.
Bottom Line:-
The above method helps you to import Gmail mailboxes in Outlook 2013 environment. Similarly, you can follow the process from Gmail to Outlook 2019, 2016, 2010 and others. After all, steps are finalized, Google email can be easily opened, composed and sent to others via Outlook.
