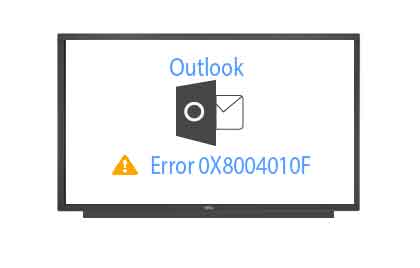
As you know, many email clients are moving forward to using Outlook. Because it provides the best environment for working for all businesses and organizations. But sometimes there is a sudden error occurred, which leads to difficulty in the work. One of the errors we will talk about today.
Behind the reason of error 0x8004010F:-
1:-Change the Outlook File Path.
2:-Someone or you have changed your Outlook file name.
3:-OST file becomes corrupted.
4:-When you try to use the old Outlook file in the new Outlook version.
5:-Outlook is not properly configured.
How to resolve the 0x8004010F error:-
Method 1:-
Relocate the Default Outlook data file:-
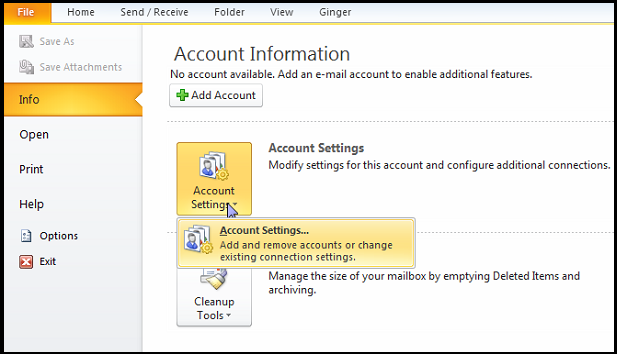
A:-Open MS Outlook Application then navigate File>>Account Setting.
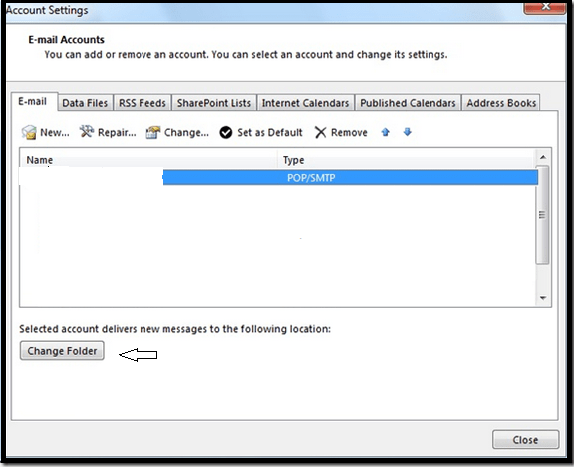
B:-Then a Dialog box would appear on the screen >> Select “Email” tab >> Choose email account in which you receive the error >>hit on “the change Folder”
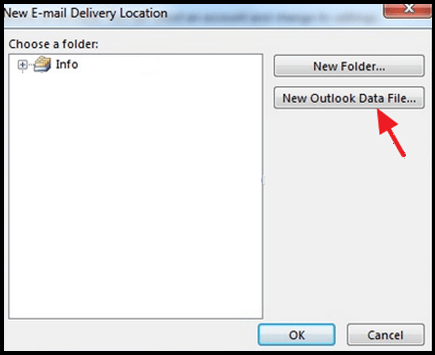
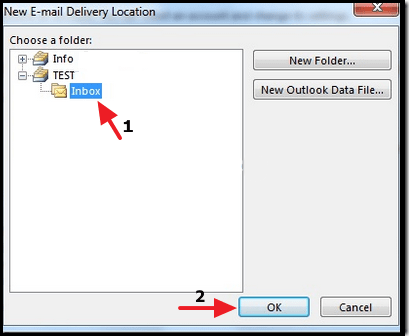
C:-Again you receive a Dialog box “New Email Delivery Location”. Here select the New Outlook data file button. Then you need to provide a name of new outlook data file name (Ex: – TEST) and click on ok. After that select inbox subfolder and hit on Ok.
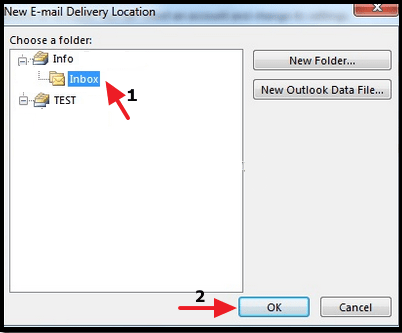
D:-Again Open account setting Dialog box and click on Change Folder.
After that select correct data file and folder where you want to move your data that select ok.
E:- Now restart the Outlook and click on Send /Receive All Folders or press the F9 button by the Keyboard.
(Note:-when you follow all above steps then you need to sour that or are connected with exchange server.)
Method 2:-
Create a new Outlook Profile:-
*Auto account Setup:-
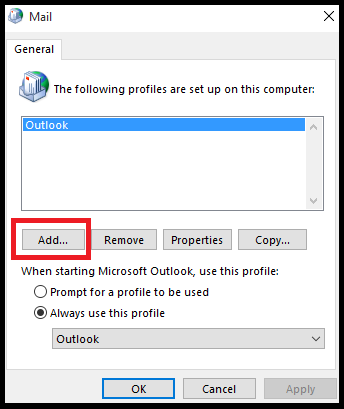
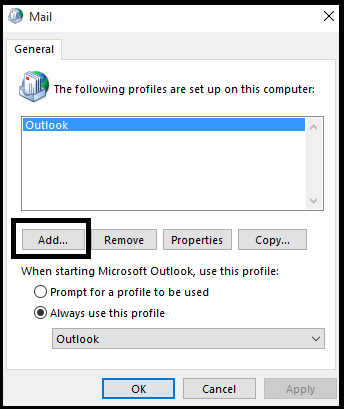
A:-Open Control Panel >>select Mail option than a dialog window “Mail Setup-Outlook Window” will be open>>hit ON Show Profile.

B:-Then a Mail dialog box will appear on the screen>>click on add option and provide the new profile name >>select Ok
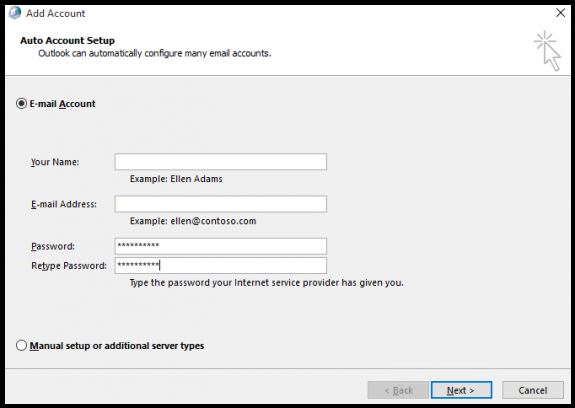
C:-After that a new window will show, use here auto Account setup and provide the email id and password >>next.
D:-If you are using pop3, you choose change account setup and provide old PST data with Browse section and finish
E:-After that restart MS Outlook and press F9 in the keyboard.
* Manual option Setup:-
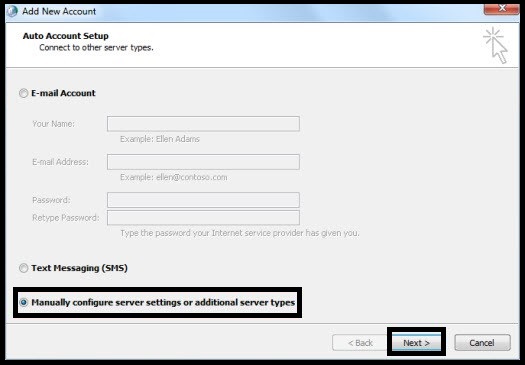
A:-Go to control panel>> click on mail tab>>in mail setup-Outlook box>>select show properties

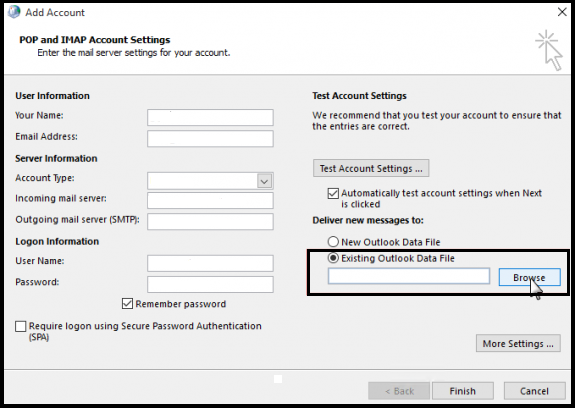
B:-In mail window choose to add tab>>choose Manually configure server settings or additional server types radio button and hit on next.
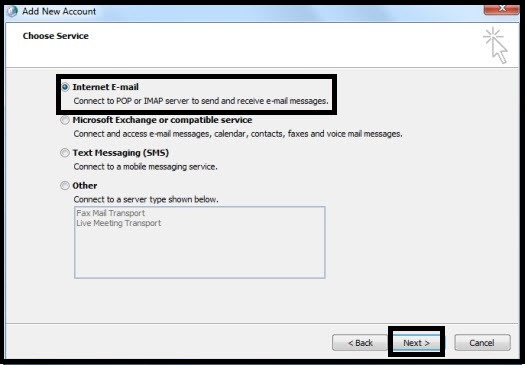
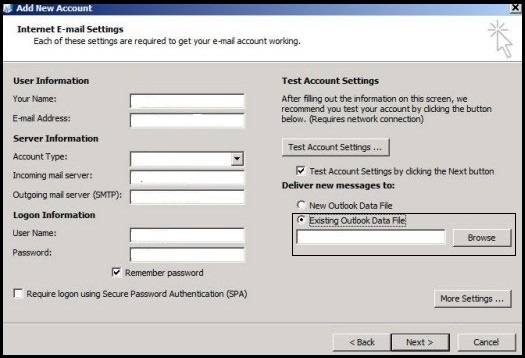
C:-Select “Internet E-mail” in “add new account” window press next>> provide all details and after that select Existing outlook data file.
D:-Click on next >>after complete process hit on the finish
E:-Open Outlook and select Send /Receive All Folders.
Conclusion:-Here I completely informed you “How to fix error “0x8004010F or 0x8004010F Outlook data file cannot be accessed”. If you have any doubt, please drop a comment in the comment section.